Create and Configure an MCP Server
This guide walks through creating a new MCP server, selecting skills, configuring authentication, and calling your endpoint — all from a single screen.
You'll need access to Actions Pro with at least one published runbook or workflow, and permission to manage MCP servers in your organization. See the MCP Server Builder Overview for key concepts.
Step 1: Navigate to Dynamic MCPs
- Click MCP Servers in the navigation menu.
- You'll see a list of existing Dynamic MCPs, each showing its name, description, endpoint path, number of skills, and status (active or draft). From here you can click an existing MCP to modify it, or create a new one.
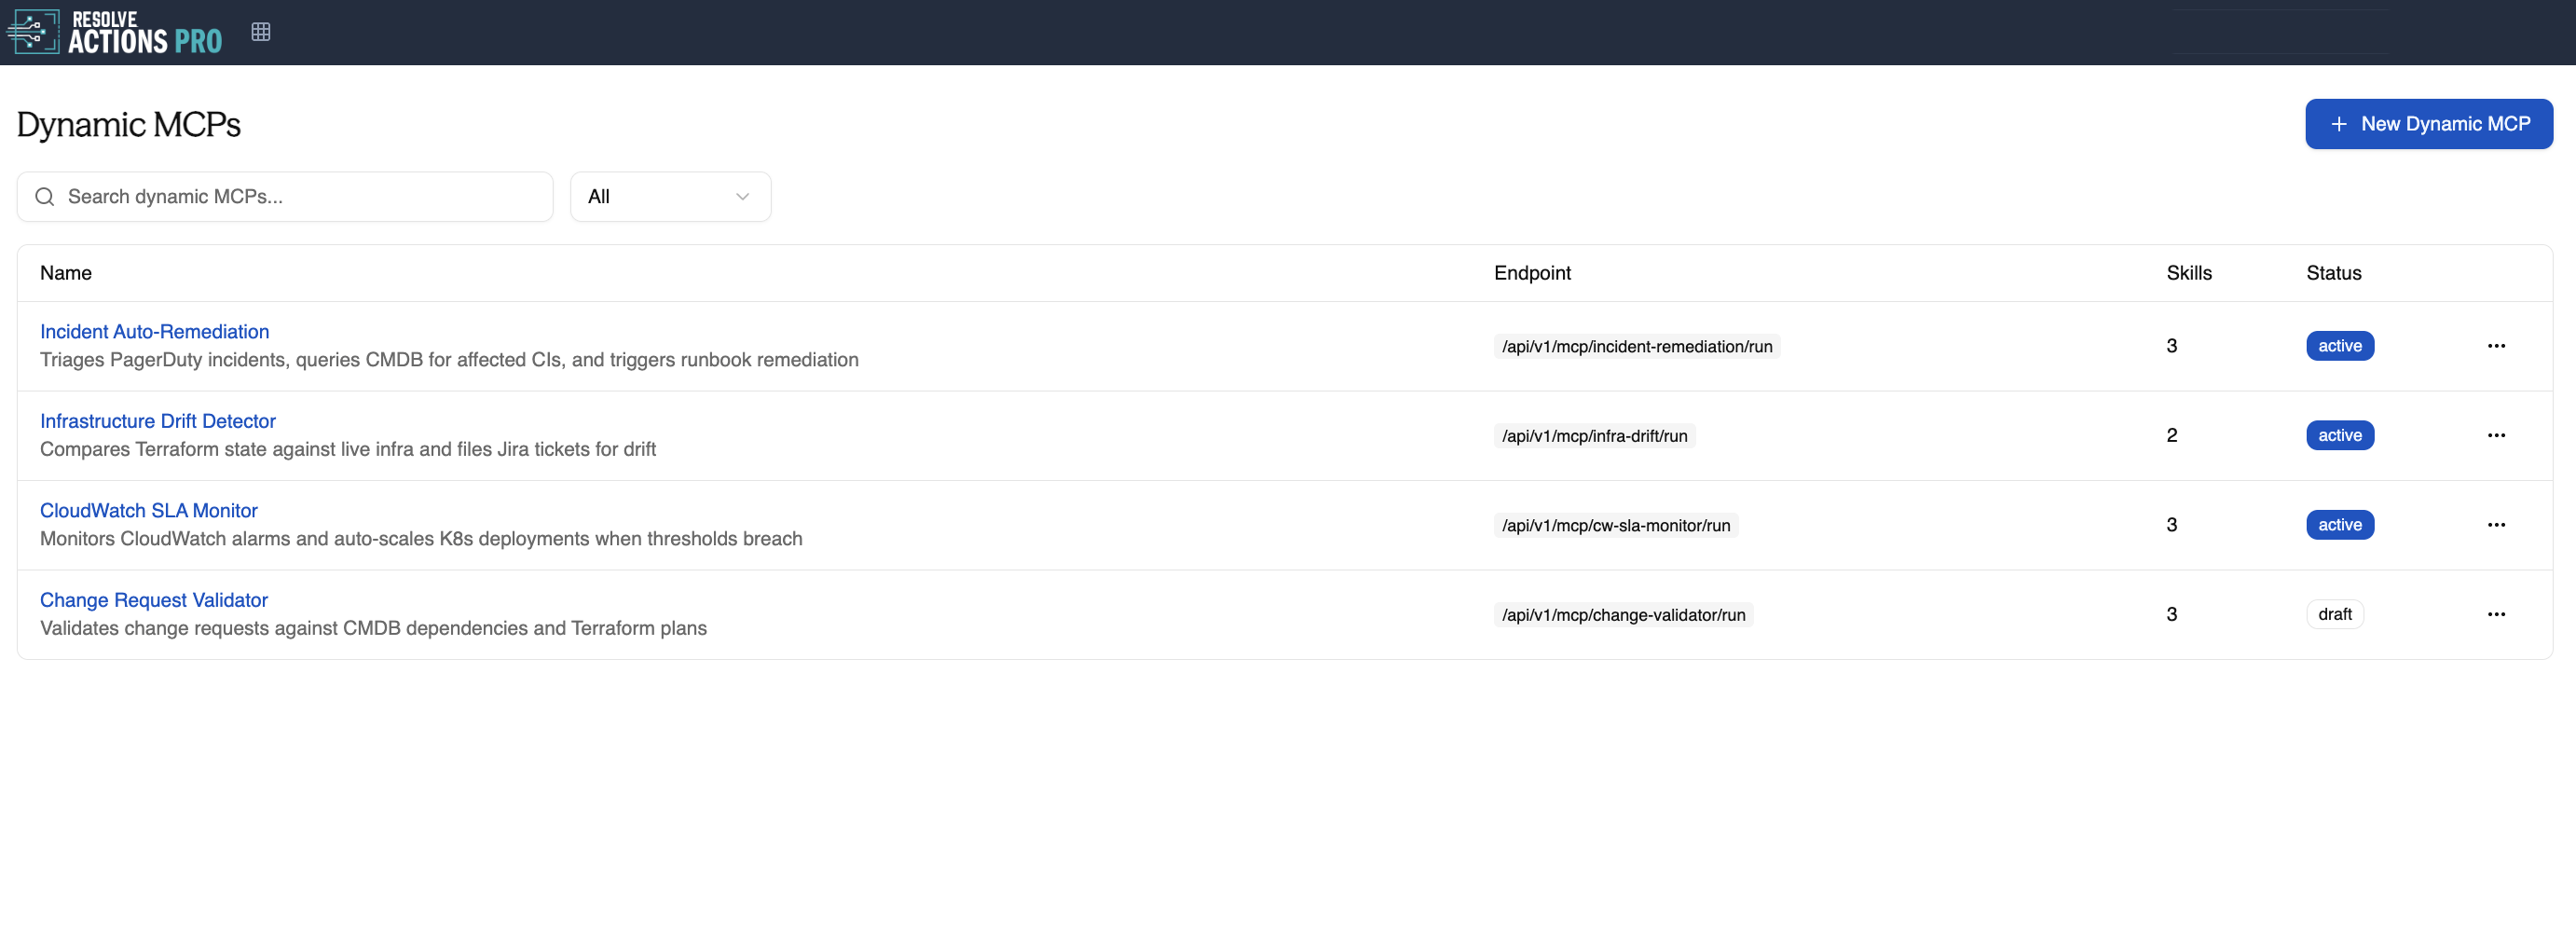
Step 2: Create a New Dynamic MCP
Click + New Dynamic MCP in the top right corner.
Fill in the following fields:
Field Description Name A human-readable label for this server (e.g., "Password Reset"). Description A short summary of what this agent does. Endpoint Slug Auto-generated from the name you enter. As you fill in the form, the Endpoint panel on the right updates in real time, showing your callable URL and a ready-to-use curl example.
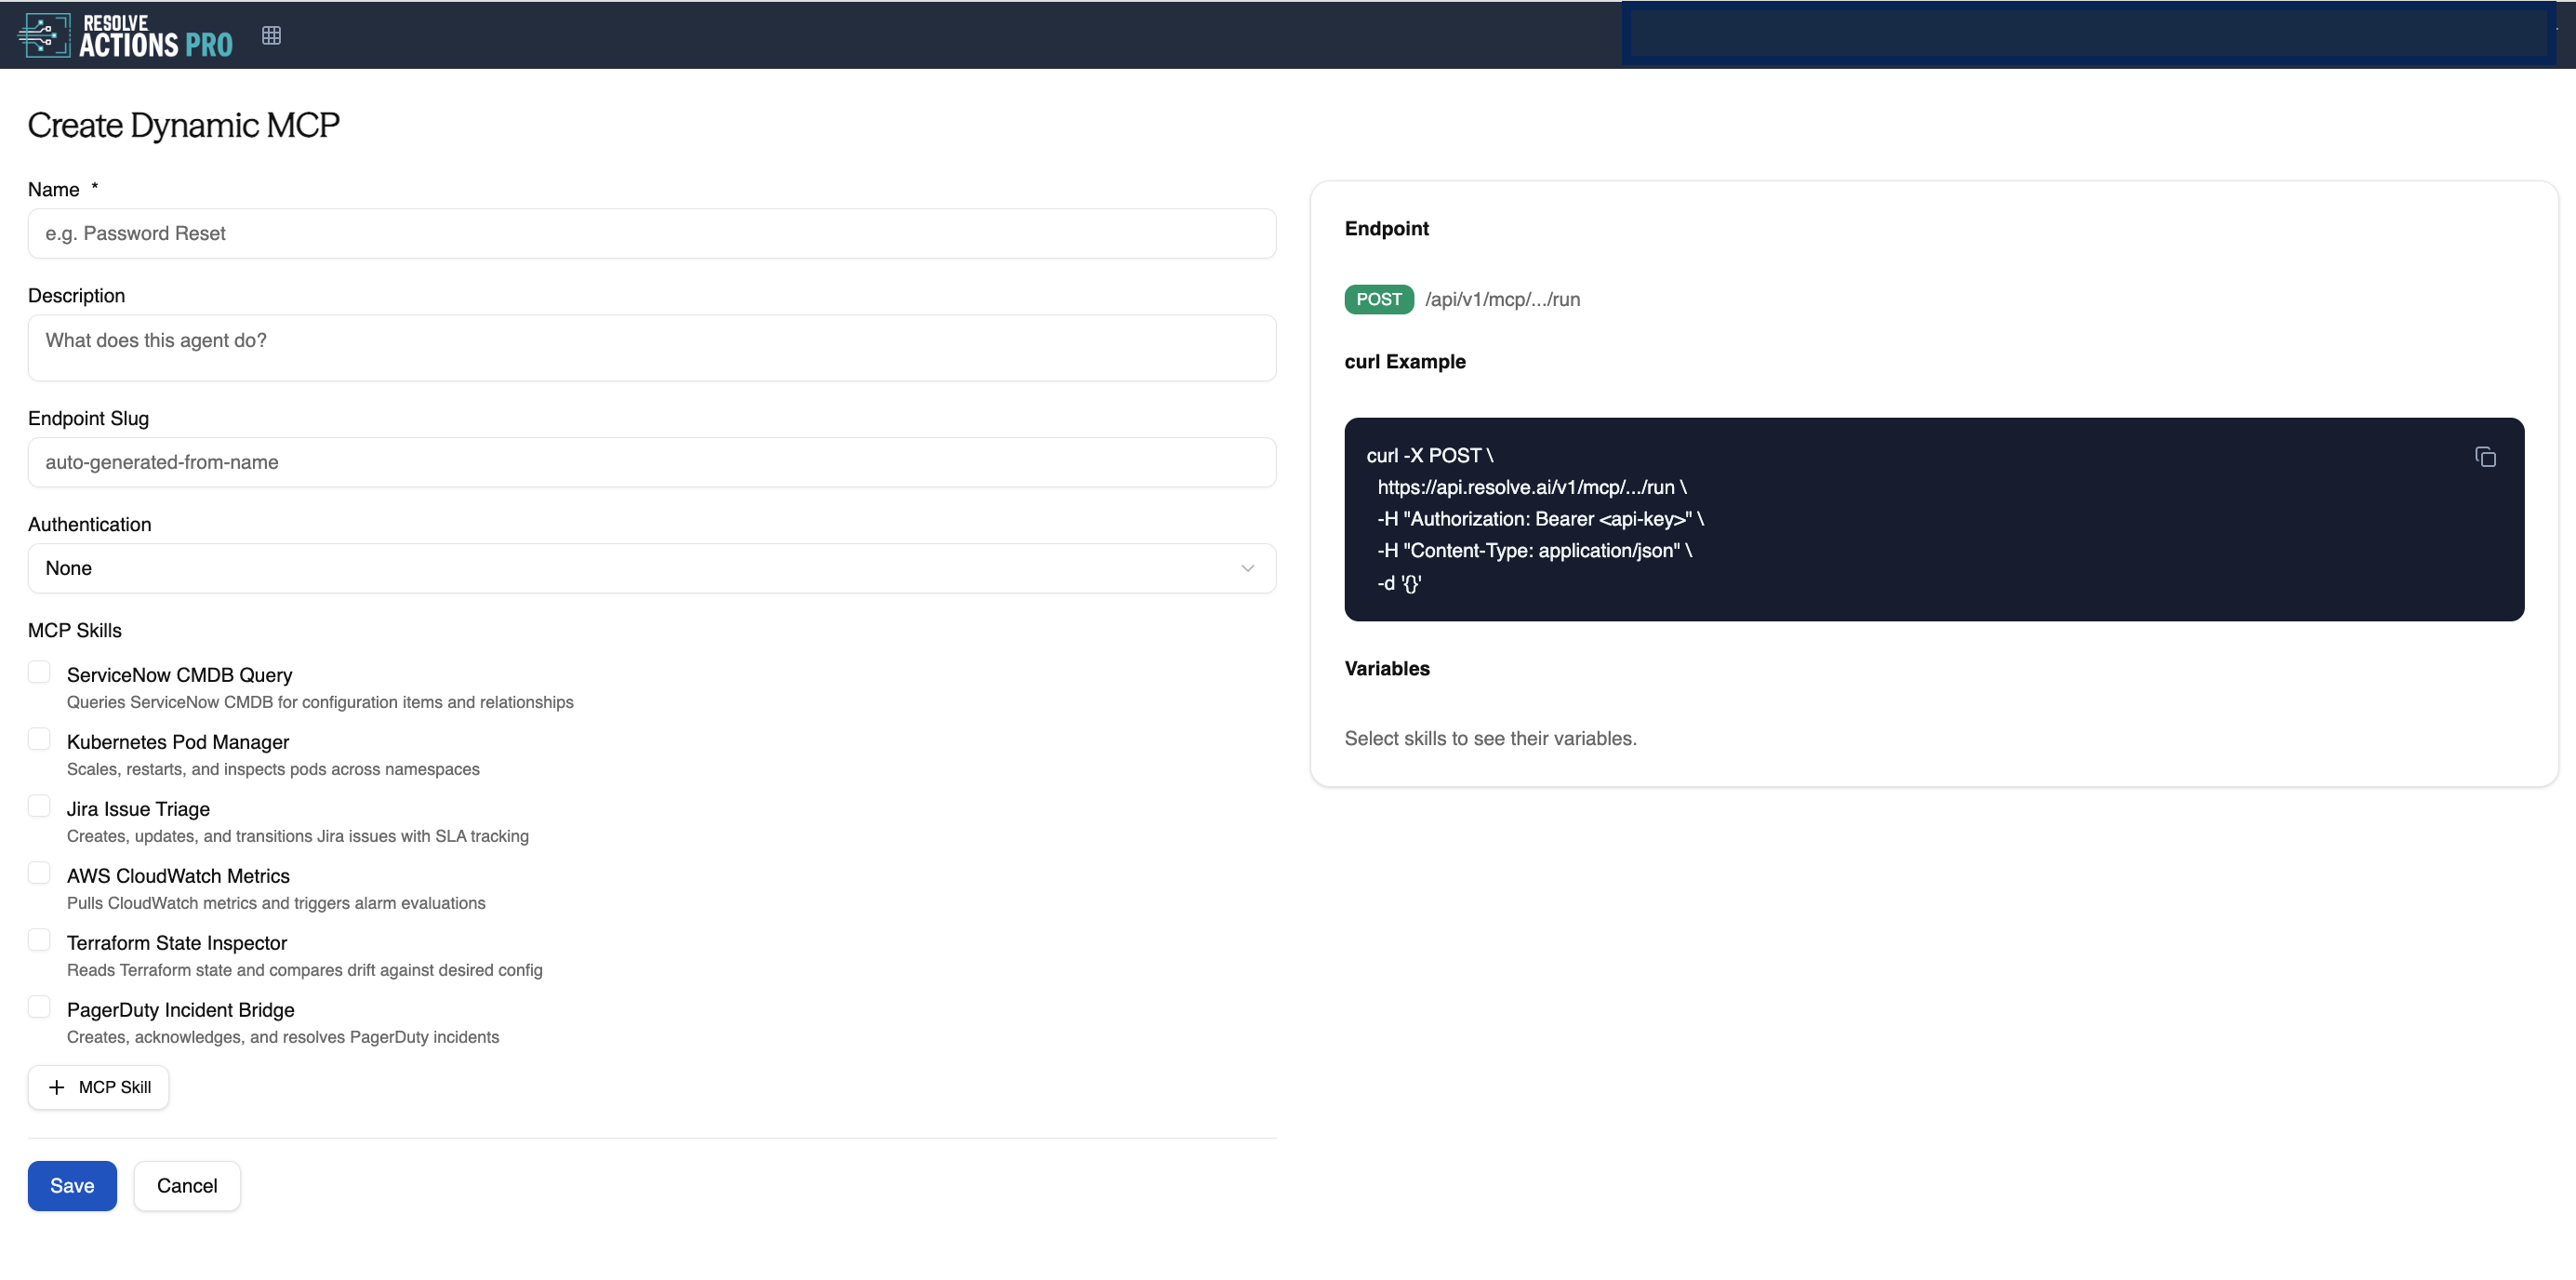
Step 3: Configure Authentication
Under Authentication, select the method that fits your use case:
Type When to Use What's Required None For internal or trusted environments only Nothing — endpoint is open OAuth When callers authenticate via an identity provider Client secret Basic Auth When callers authenticate with a username and password Username and password The UI will display the required credential fields based on your selection.
Use None only in controlled environments. Any caller with the endpoint URL will have access.
Step 4: Select MCP Skills
- Under MCP Skills, browse the available runbooks and workflows from your Actions Pro library.
- Toggle on each skill you want to expose through this MCP server.
- Each selected skill will:
- Appear in the tool list returned when agents call the MCP
- Populate its input variables in the Variables panel on the right
You can also add a new skill directly from this screen by clicking + MCP Skill.
Only select the skills you specifically want agents to access. You can add or remove skills at any time after creation.
Step 5: Review the Endpoint Panel
As you configure your server, the right-hand panel updates automatically with everything needed to call the MCP:
- Endpoint URL — The
POSTaddress for your MCP server (e.g.,https://api.resolve.ai/v1/mcp/.../run) - curl Example — A ready-to-use curl command with your endpoint URL, authorization header, and content type pre-filled
- Variables — The required and optional input variables populated from your selected skills
Use the copy button in the curl example block to grab the command and test your endpoint immediately.
Step 6: Save Your MCP Server
Once you've configured the name, authentication, and skills, click Save to create the server.
Managing Existing Dynamic MCPs
From the Dynamic MCPs landing page you can:
- Search for an existing MCP by name using the search bar
- Filter by status (active or draft) using the All dropdown
- Edit an existing MCP by clicking its name to change its description, auth settings, or skill selection
- Delete an MCP using the options menu (...) on the right of any row
Deleting a Dynamic MCP immediately deactivates the endpoint. Any agent or system calling it will begin receiving errors. Coordinate with dependent teams before deleting.